Memories Wall Spotter - 600 x 300mm

Memories Wall Spotter - 600 x 300mm
![]()
Buy online with 4 interest-free payments.
-
 Confirm Stock Availability
 -
 When will I get it?
 -
 90 days hassle free returns
 -
 Buy online, collect in store
Buy Online and get next day delivery.
90% of online orders are delivered next day.
Click “Check Stock” and if available locally, buy online and we'll deliver the next day.
Buy Online and get 90 Day hassle free returns.
Experience no risk to you
Shop with assurance and peace of mind.
Enjoy easy return options at 74 stores nationwide.
Reserve your stock and collect instore.
Buy online to reserve your stock
Pay securely online & Collect from over 70 stores nationwide
Save time & skip the queue
Orders are normally ready within 3 hours.
Click 'Check Stock' to confirm store availability. Buy online, and we'll reserve it for collection.

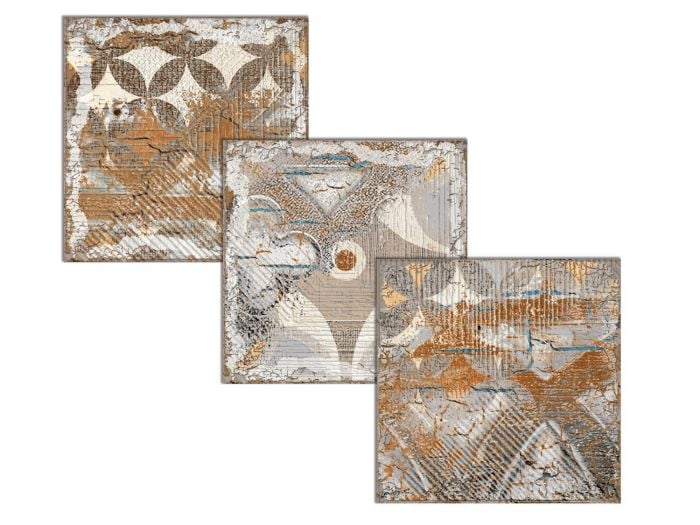
The Memories Wall Spotter is filled with calming images and peaceful words, very welcoming for any visitor. Proudly manufactures in South Africa. Once printed, the tile is re-fired/baked allowing for the inks to melt into the glaze of the tile thus making this ceramic picture easy to install, clean and maintain.
Perfect for:
This range has a matching wall listello to help extend the peaceful look, for wall installation only.
Product Specifications
| Brand | CTM South Africa |
|---|---|
| Tile Type | Ceramic |
| Thickness (mm) | 7,8 mm |
| Length (mm) | 600 mm |
| Width (mm) | 300 mm |
| Finish / Texture | Matt |
| Colour | White |
| Type | Spotters |
How To Install Mosaic Tiles
- The installation surface must be smooth and clean to ensure proper installation.
- It may be necessary to hack the wall to allow the adhesive to be able to set properly.
- Make sure the wall is dry and dust free before applying the adhesive.

- Measure the space in which the mosaic is being installed to determine the best fit for your tile.
- Use a straight edge and level to help you align the tile as you work.
- Construct a grid on the substrate that is equal to nine sheets of the tile.
Tip : Be sure to account for the spaces between each sheet of tile when measuring. It woudl help to dry lay the mosiac tiles on the floor first for you to see where you will be able to install the tiles with minimum cutting.

-
Mix the Pro Grip White Mosaic Fix adhesive.
First coat: apply setting material with the smooth edge of a trowel to a section no larger than one section of the grid.
Second coat: create even ridges in the setting material by “combing” the material with the notched edge of the trowel
Tip : Do not apply any adhesive to the mosaic sheet
Tip : Do not apply any adhesive to the mosaic sheet.

- Most sheets of mosaic have a clear film covering on the front face of the tile. This allows the mosaic design to be seen during installation.
- Apply the back meshed side of each sheet into the adhesive.
- Using a float tool, tap across the surface to adhere the mosaic securely into the adhesive.
Tip : The space between each sheet of tile should equal the space between each individual mosaic tile. Use a spacer that is of equal size.

- It is important to create a secure bond between the tiles and the adhesive.
- Using the float tool tap across the surface to adhere the mosaic securely.
- This also ensures the final exposed plane of the mosaic is consistent and uniform in height.
- This can be a time consuming process, but is important to ensure a professional installation.
- Adjust while the adhesive is still wet.
- Correct any tiles that are uneven and ensure that all gaps are of equal width and height. Do this by cutting through the clear tape and moving tiles with a small trowel.

- Grout can be applied to a clean, dry surface.
- Before applying grout be sure that the mosaic surface is clean and all clear sheets are removed from the tiles.
- Thorough cleaning may involve removing excess adhesive from the mosaic joint with a knife, as well as cleaning off all dust and particles.
- Spread grout from the bottom up in a diagonal direction using a rubber grout applicator.

- The mosaic should be cleaned after the grouting is complete.
- Use a sponge and clean water and scrub in a circular motion, removing excess grout and smoothing all joints. Continue to wipe down the tiles until clean.
Buy Online
Select your closest CTM
Sit Back
We Source & Pack Your Stock
Collect
We'll notify you when ready